Textures & Fonts
![]()
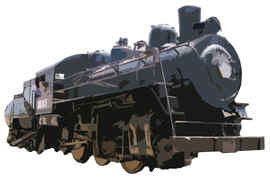
![]() Model railroading magazines and train shows are excellent resources to explore what model railways can become - a miniaturized virtual world that draws one in. In practice, a modular railway is arguably a series of interconnected dioramas. A modular wooden railway can acheive that in a more rugged fashion using durable materials that leverage photgraphic images in lieu of more fragile detailing. Those images can be photos that are modified and scaled. They could also be composite images constructed using graphics, textures and fonts.
Model railroading magazines and train shows are excellent resources to explore what model railways can become - a miniaturized virtual world that draws one in. In practice, a modular railway is arguably a series of interconnected dioramas. A modular wooden railway can acheive that in a more rugged fashion using durable materials that leverage photgraphic images in lieu of more fragile detailing. Those images can be photos that are modified and scaled. They could also be composite images constructed using graphics, textures and fonts.
Graphic Details
![]()
![]() Buildings, walls, roads, and other module surfaces can be enhanced visually with imaginative materials and custom images - paint, laminate, acrylic, and digital photos. This is also a great way to refurbish existing buildings and bridges that had a rough life in the toy box.
Buildings, walls, roads, and other module surfaces can be enhanced visually with imaginative materials and custom images - paint, laminate, acrylic, and digital photos. This is also a great way to refurbish existing buildings and bridges that had a rough life in the toy box.
![]() Images can be as simple as pictures taken of nearby buildings or walls and then scaled appropriately. A composite image can also be assembled with graphics software in combination with stock photos, textures, fonts, and visual elements from a variety of sources. Public domain images can be found online, and many commercial image or texture collections are available.
Images can be as simple as pictures taken of nearby buildings or walls and then scaled appropriately. A composite image can also be assembled with graphics software in combination with stock photos, textures, fonts, and visual elements from a variety of sources. Public domain images can be found online, and many commercial image or texture collections are available.
Public Domain
![]()
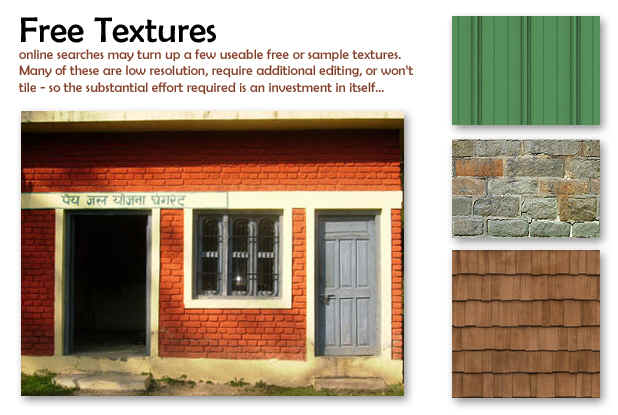
![]() A web search will turn up many sources for free textures and images. Many sites are marked as having 'dangerous downloads' which is something to keep in mind... Available images were often low resolution, distorted, or skewed at an angle. Color quality was sometimes poor with some or all of the image washed-out. Tileable versions are uncommon. Many images were also incomplete, lacking edges for example.
A web search will turn up many sources for free textures and images. Many sites are marked as having 'dangerous downloads' which is something to keep in mind... Available images were often low resolution, distorted, or skewed at an angle. Color quality was sometimes poor with some or all of the image washed-out. Tileable versions are uncommon. Many images were also incomplete, lacking edges for example.
![]()
Commercially available images and collections
![]()
![]() Images and textures are available from various online sources. Texturama offers building pictures as well as architectural textures and individual images that can be purchased. A hobby version of their collection is available, from which selected elements were used in combination with personal photos to create graphic details incorporated into my modules. Sources for textures and images that may be of interest include:
Images and textures are available from various online sources. Texturama offers building pictures as well as architectural textures and individual images that can be purchased. A hobby version of their collection is available, from which selected elements were used in combination with personal photos to create graphic details incorporated into my modules. Sources for textures and images that may be of interest include:
![]() texturama.com
texturama.com
![]() absolutetextures.com
absolutetextures.com
![]() shutterstock.com
shutterstock.com
![]()

Fonts
![]()
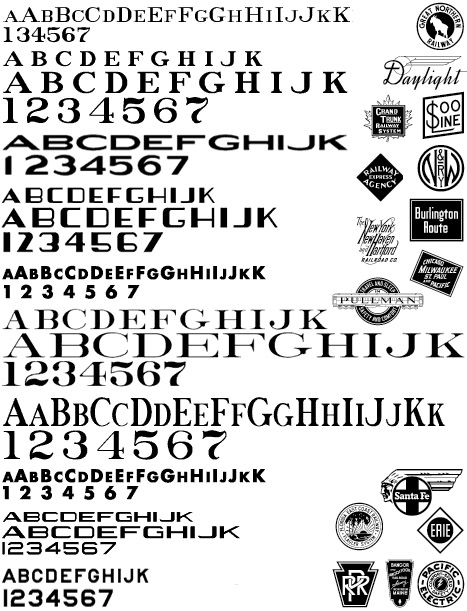
![]() A variety of fonts and logos associated with railways are available. These can be used on railroad signage and rolling stock to bring a sense of historic realism to the layout. Graphics and photos used for buildings and accessories can be customized with new building names and signage too.
A variety of fonts and logos associated with railways are available. These can be used on railroad signage and rolling stock to bring a sense of historic realism to the layout. Graphics and photos used for buildings and accessories can be customized with new building names and signage too.
![]() railfonts.com
railfonts.com
![]() fontspace.com
fontspace.com
![]() dafont.com
dafont.com
![]()
Original images and textures
![]()
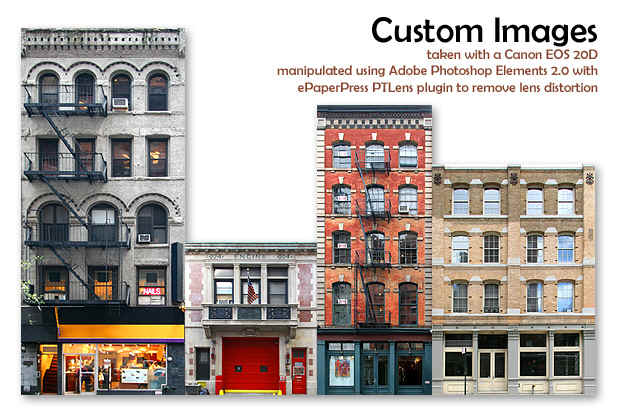
![]() With a decent camera and basic graphic editing tools, one can create quality custom images. An overcast day is best to minimize harsh shadowing. Shown are a few developed using photos taken during a trip to Manhattan. Pictures were taken with a Canon EOS 20D camera, manipulated with Adobe Photoshop Elements 2.0, and corrected for lens distortion using the PTLens plugin from ePaperPress. Additional details outlining one method for manipulating images to generate a straight-on front view follows...
With a decent camera and basic graphic editing tools, one can create quality custom images. An overcast day is best to minimize harsh shadowing. Shown are a few developed using photos taken during a trip to Manhattan. Pictures were taken with a Canon EOS 20D camera, manipulated with Adobe Photoshop Elements 2.0, and corrected for lens distortion using the PTLens plugin from ePaperPress. Additional details outlining one method for manipulating images to generate a straight-on front view follows...
![]()
Creating custom images from photos
![]()
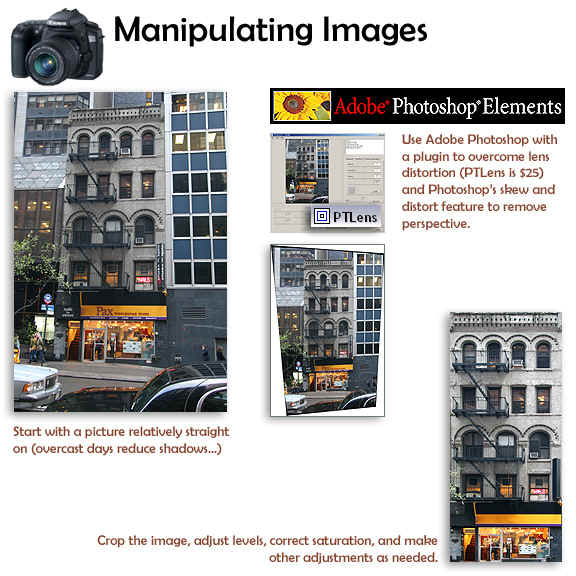
![]() A number of resources and instructions can be found online. Above are the basic steps involved using one of my building photos as an example.
A number of resources and instructions can be found online. Above are the basic steps involved using one of my building photos as an example.
![]()
Applying Custom Images
![]()
![]() 3M Super 77 spray adhesive works well for affixing custom images to wood blocks and train cars. Coat both surfaces for a really strong bond. For crisp, clean building lines - use a black or warm gray permanent flow pen (e.g. Sharpie) on the edge of the photo to darken the exposed white paper edge. Paste the building front and one side first. Then sand the opposite side and back face to the final dimensions. Glue the remaining side and back and then sand the top and base flush. Attach a roof image or sloped roof on top to finish the building. Touch up any remaining white spots with your black pen and then varnish the building to protect it and remove the photographic sheen.
3M Super 77 spray adhesive works well for affixing custom images to wood blocks and train cars. Coat both surfaces for a really strong bond. For crisp, clean building lines - use a black or warm gray permanent flow pen (e.g. Sharpie) on the edge of the photo to darken the exposed white paper edge. Paste the building front and one side first. Then sand the opposite side and back face to the final dimensions. Glue the remaining side and back and then sand the top and base flush. Attach a roof image or sloped roof on top to finish the building. Touch up any remaining white spots with your black pen and then varnish the building to protect it and remove the photographic sheen.
![]() Consider crushing the sharp corners on the block using the shaft of a screwdriver - curling the photographic edges slightly inward. Routing a notch into exposed corners and inserting a thin strip of hardwood (e.g. walnut or maple) might improve durability as exposed edges tend to fray over time.
Consider crushing the sharp corners on the block using the shaft of a screwdriver - curling the photographic edges slightly inward. Routing a notch into exposed corners and inserting a thin strip of hardwood (e.g. walnut or maple) might improve durability as exposed edges tend to fray over time.
![]()