
Module Dimension Details
![]()
![]() Segments are based on a modular 18" x 48" box that can rest on the floor or be raised to coffee table level for ease of play. Sections can also be incorporated into a shelf railroad along a wall. Easily stored and accessible from either side - important for households unable to devote the space needed for the large play tables commercially available. Adjacent sections can be clamped or bolted together to prevent stress on the track used to join modules.
Segments are based on a modular 18" x 48" box that can rest on the floor or be raised to coffee table level for ease of play. Sections can also be incorporated into a shelf railroad along a wall. Easily stored and accessible from either side - important for households unable to devote the space needed for the large play tables commercially available. Adjacent sections can be clamped or bolted together to prevent stress on the track used to join modules.
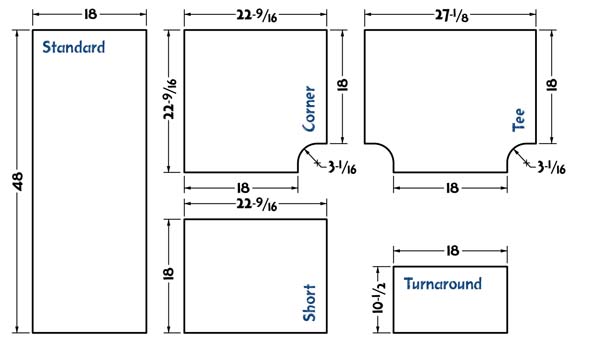
![]() This size simplifies construction using 4'x8' or 5'x5' apple-ply or birch-ply plywood sheets, allows sections to be easily carried in a backseat or trunk and accommodates large (6˝") radii curved track.
This size simplifies construction using 4'x8' or 5'x5' apple-ply or birch-ply plywood sheets, allows sections to be easily carried in a backseat or trunk and accommodates large (6˝") radii curved track.
Module Box Frame
![]()
![]() You will need enough 1"x4" lumber to construct the sides and ends of each module. Consider using poplar sourced from a traditional lumber yard – it strikes a good balance for cost and strength, flexes a bit to conform to floors that aren’t level, doesn’t tend to splinter and is fairly easy to cut, route, and sand.
You will need enough 1"x4" lumber to construct the sides and ends of each module. Consider using poplar sourced from a traditional lumber yard – it strikes a good balance for cost and strength, flexes a bit to conform to floors that aren’t level, doesn’t tend to splinter and is fairly easy to cut, route, and sand.
![]() I made construction of my first few box frames harder than necessary. Instead of dovetailing or using a corner lock bit, I cut a simple mitre and used biscuits to join the corners. When that joint failed, I notched and splined the corner. Check at Woodcraft or Rockler for corner lock bits - or simply butt or route a step at the ends to keep joints square. But consider adding a spline for greater strength.
I made construction of my first few box frames harder than necessary. Instead of dovetailing or using a corner lock bit, I cut a simple mitre and used biscuits to join the corners. When that joint failed, I notched and splined the corner. Check at Woodcraft or Rockler for corner lock bits - or simply butt or route a step at the ends to keep joints square. But consider adding a spline for greater strength.
![]() An inside edge lip is needed on all sides and ends so the table top can be dropped into place and glued. Cut this before you assemble the box. Also consider using a small roundover bit on the outside edge for splinter control and to reduce elbow, chin and forehead dents later...
An inside edge lip is needed on all sides and ends so the table top can be dropped into place and glued. Cut this before you assemble the box. Also consider using a small roundover bit on the outside edge for splinter control and to reduce elbow, chin and forehead dents later...
Leg Supports
![]()
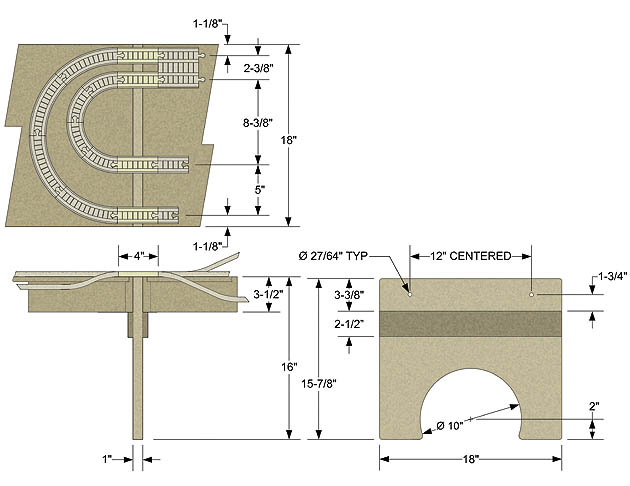
![]() For the leg supports, I started with a 1" sheet of cabinet-grade plywood. This was then cut into 16"x18" sections and the arch was cut on a band saw using a centering hole and jig. Take time to break sharp edges with a roundover bit to reduce splinters and chipped edges. Put a felt square on the base of the leg to prevent marring on hardwood or tile floors.
For the leg supports, I started with a 1" sheet of cabinet-grade plywood. This was then cut into 16"x18" sections and the arch was cut on a band saw using a centering hole and jig. Take time to break sharp edges with a roundover bit to reduce splinters and chipped edges. Put a felt square on the base of the leg to prevent marring on hardwood or tile floors.
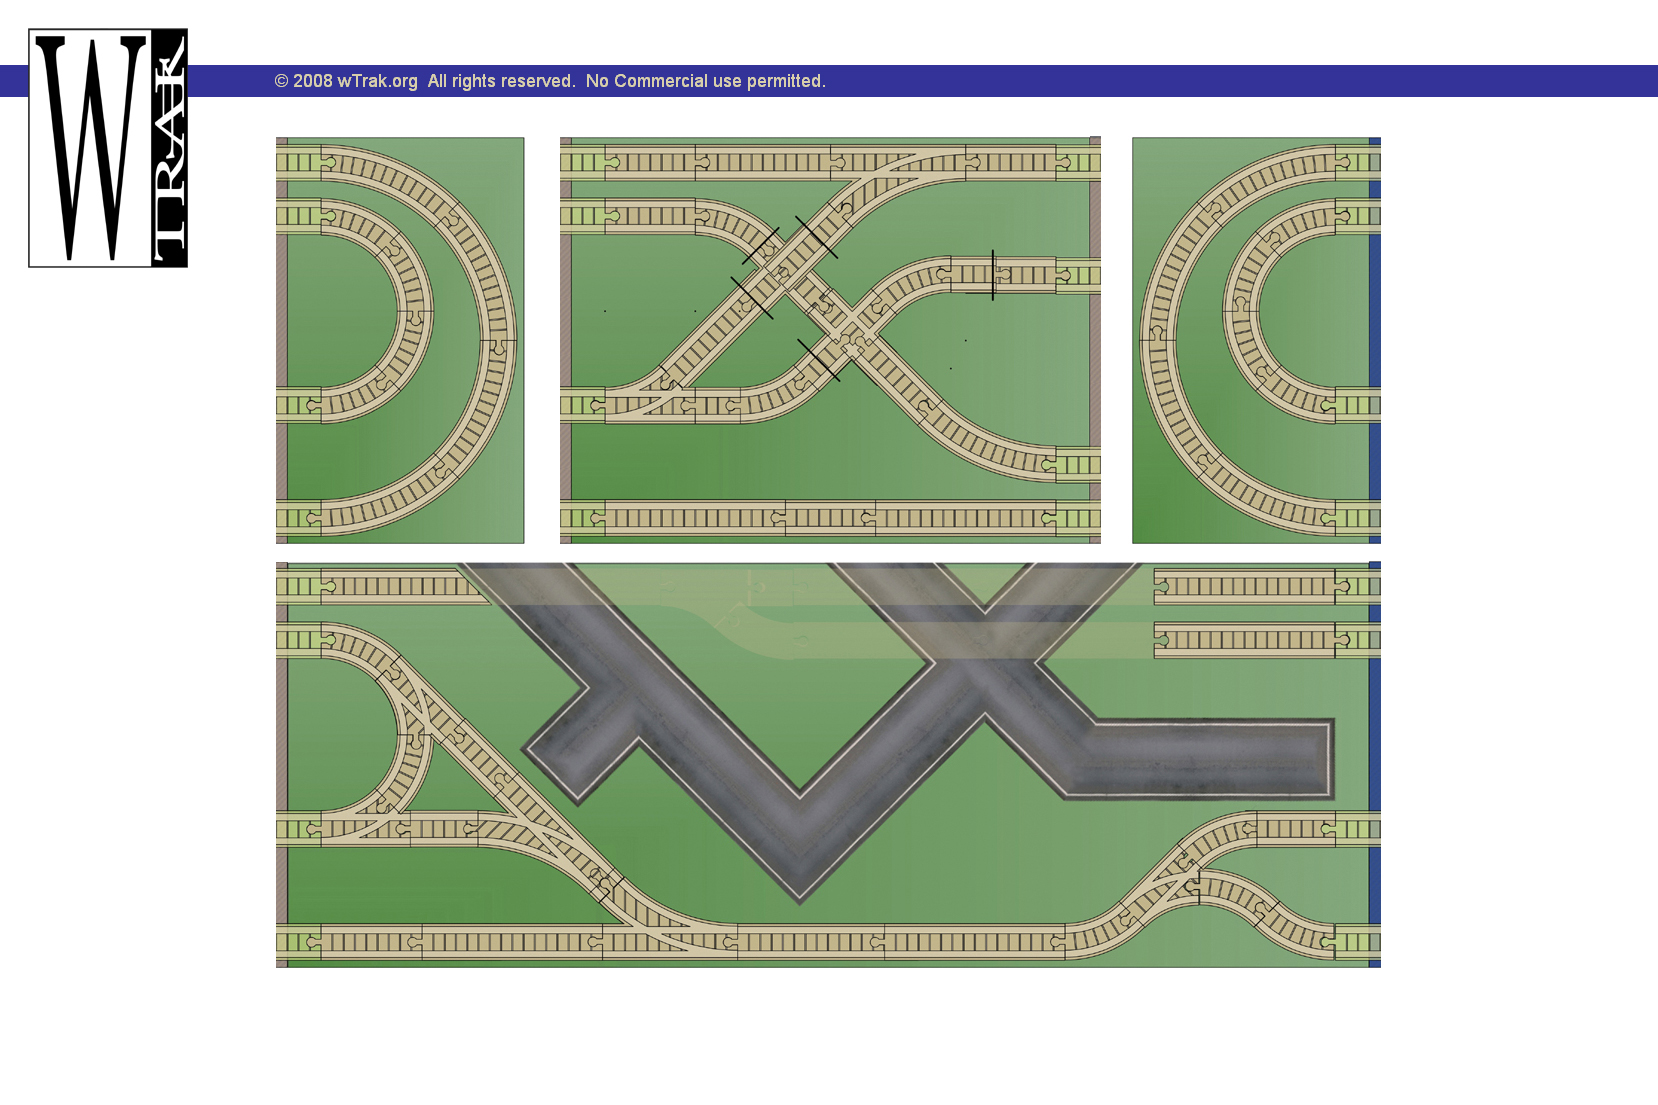
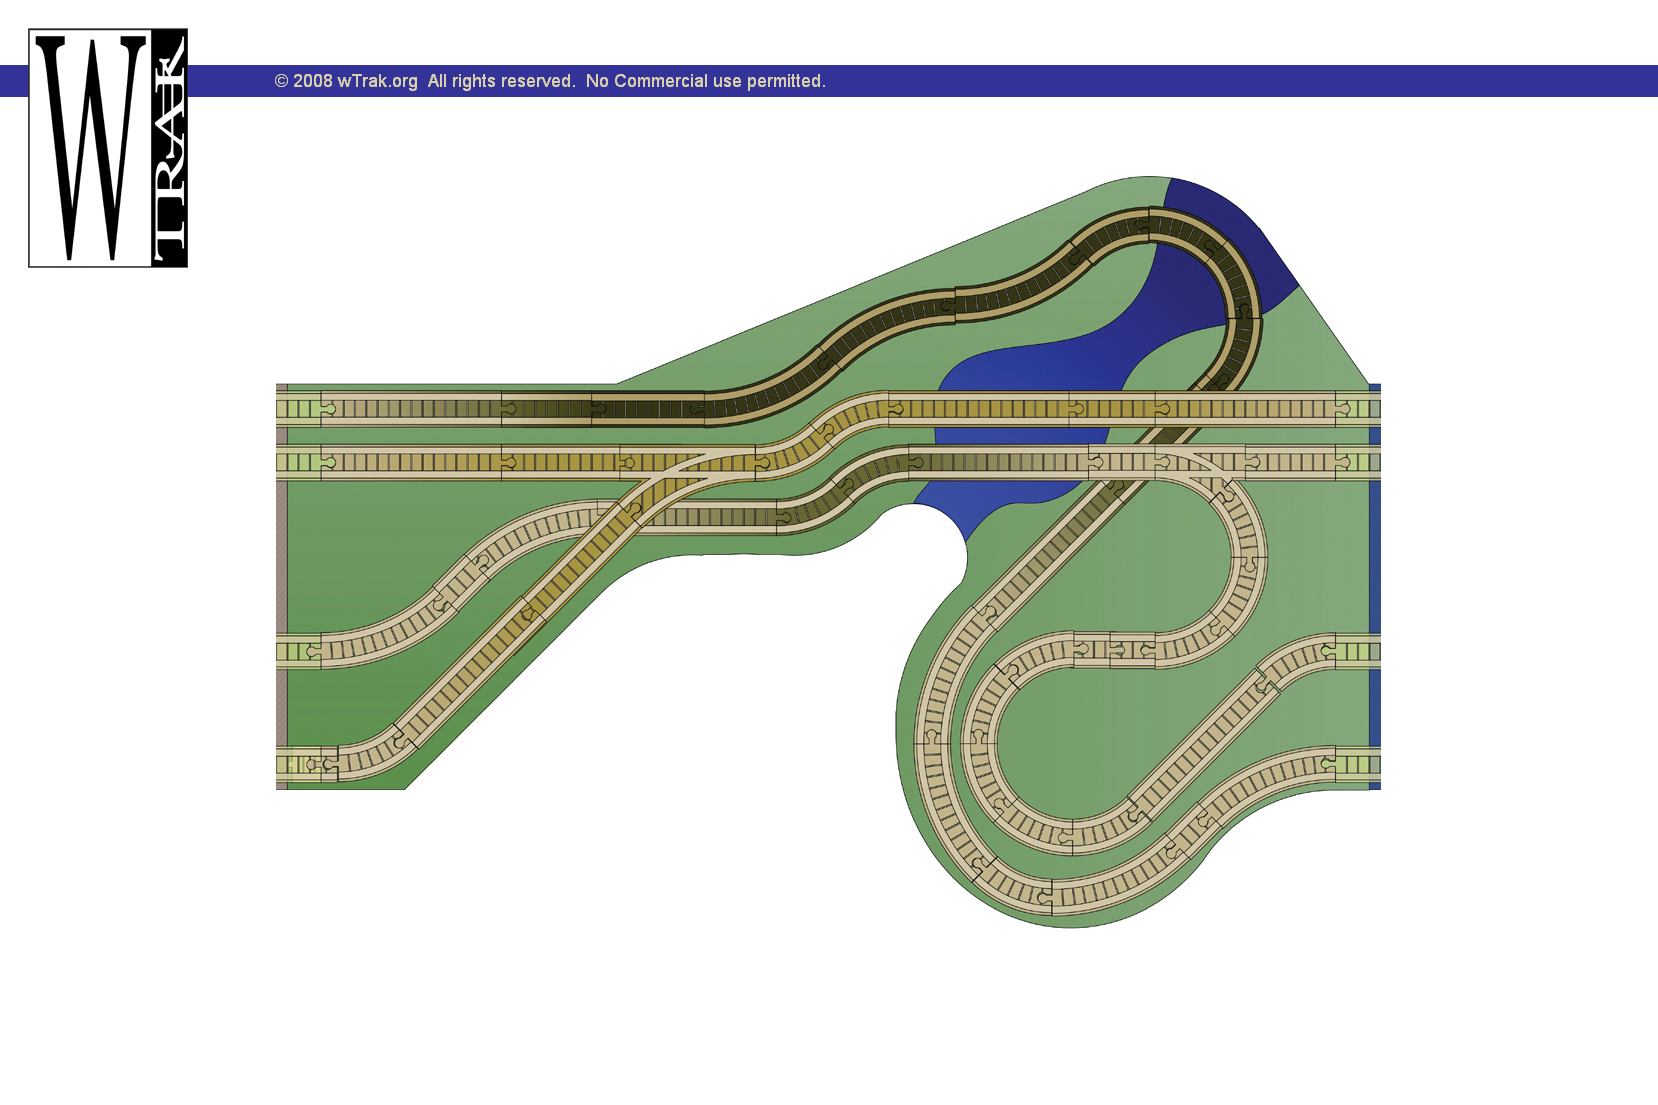
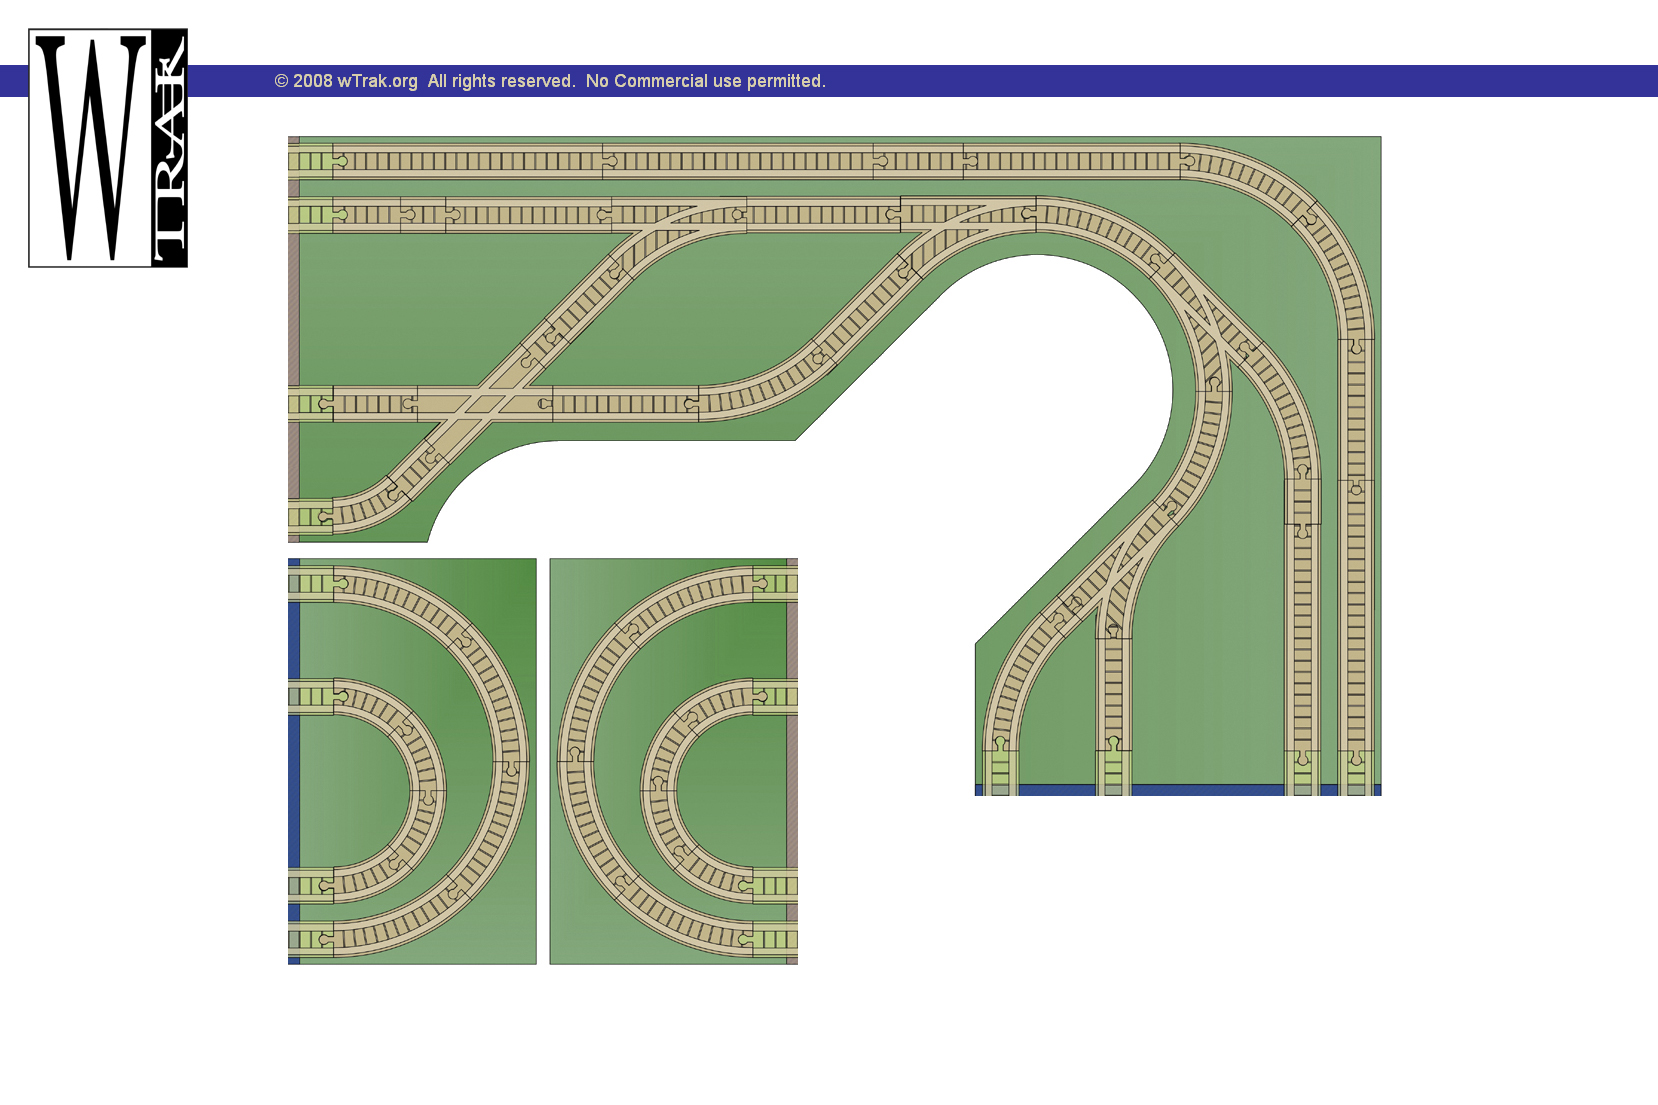
Module Tiles
![]()
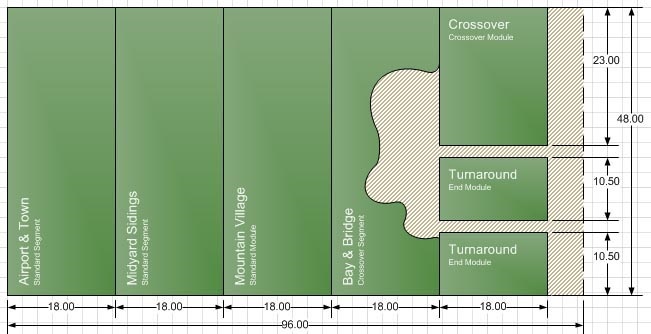
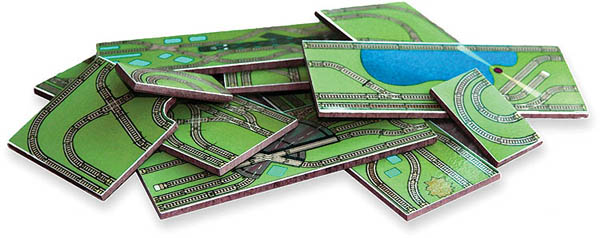
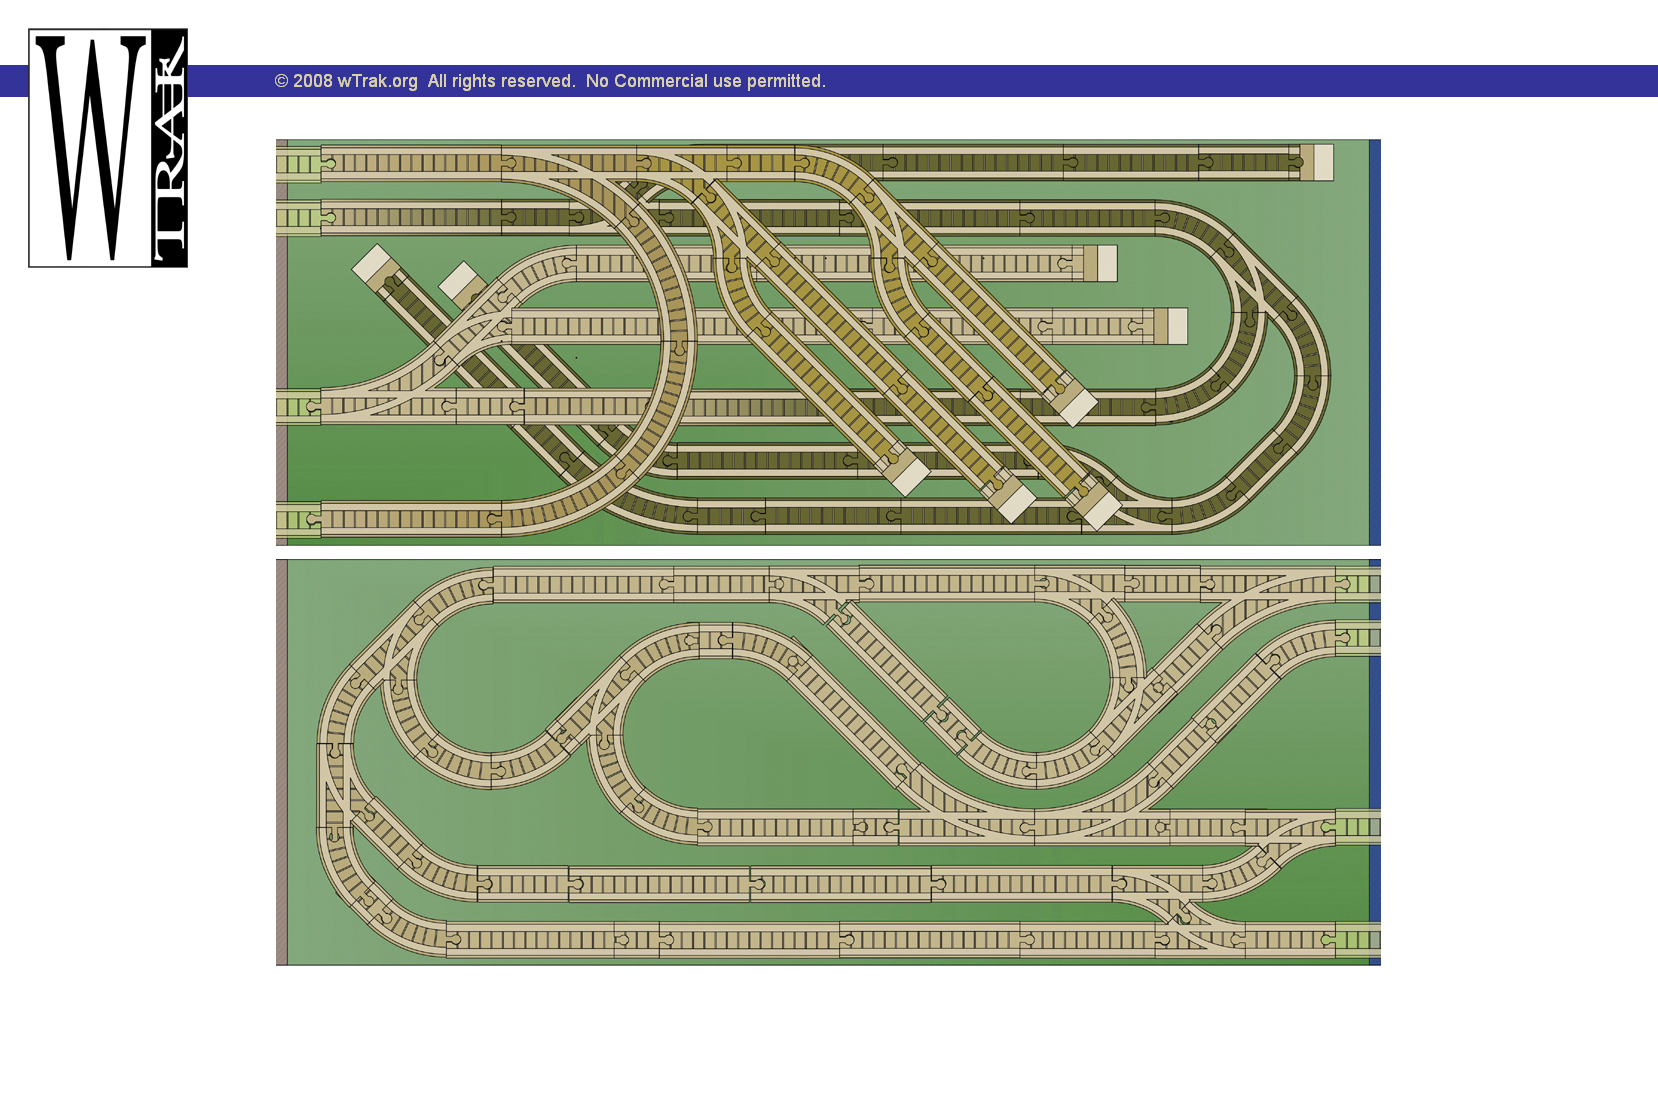
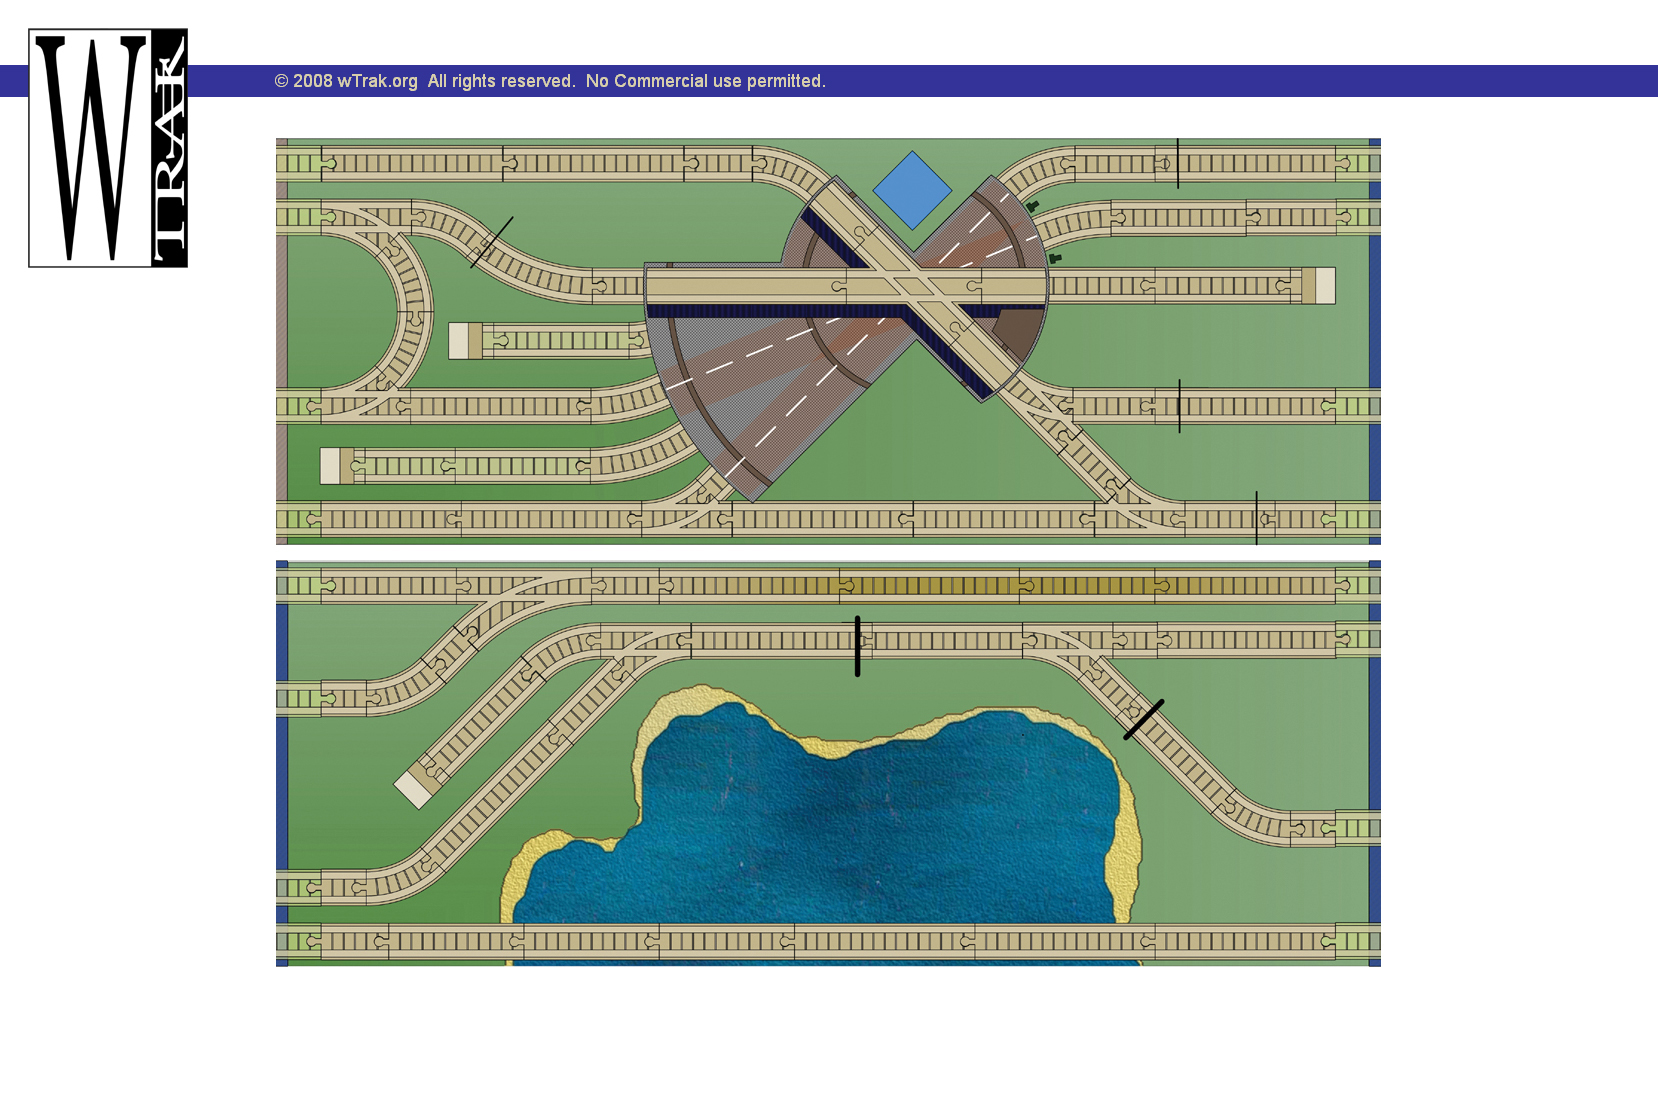
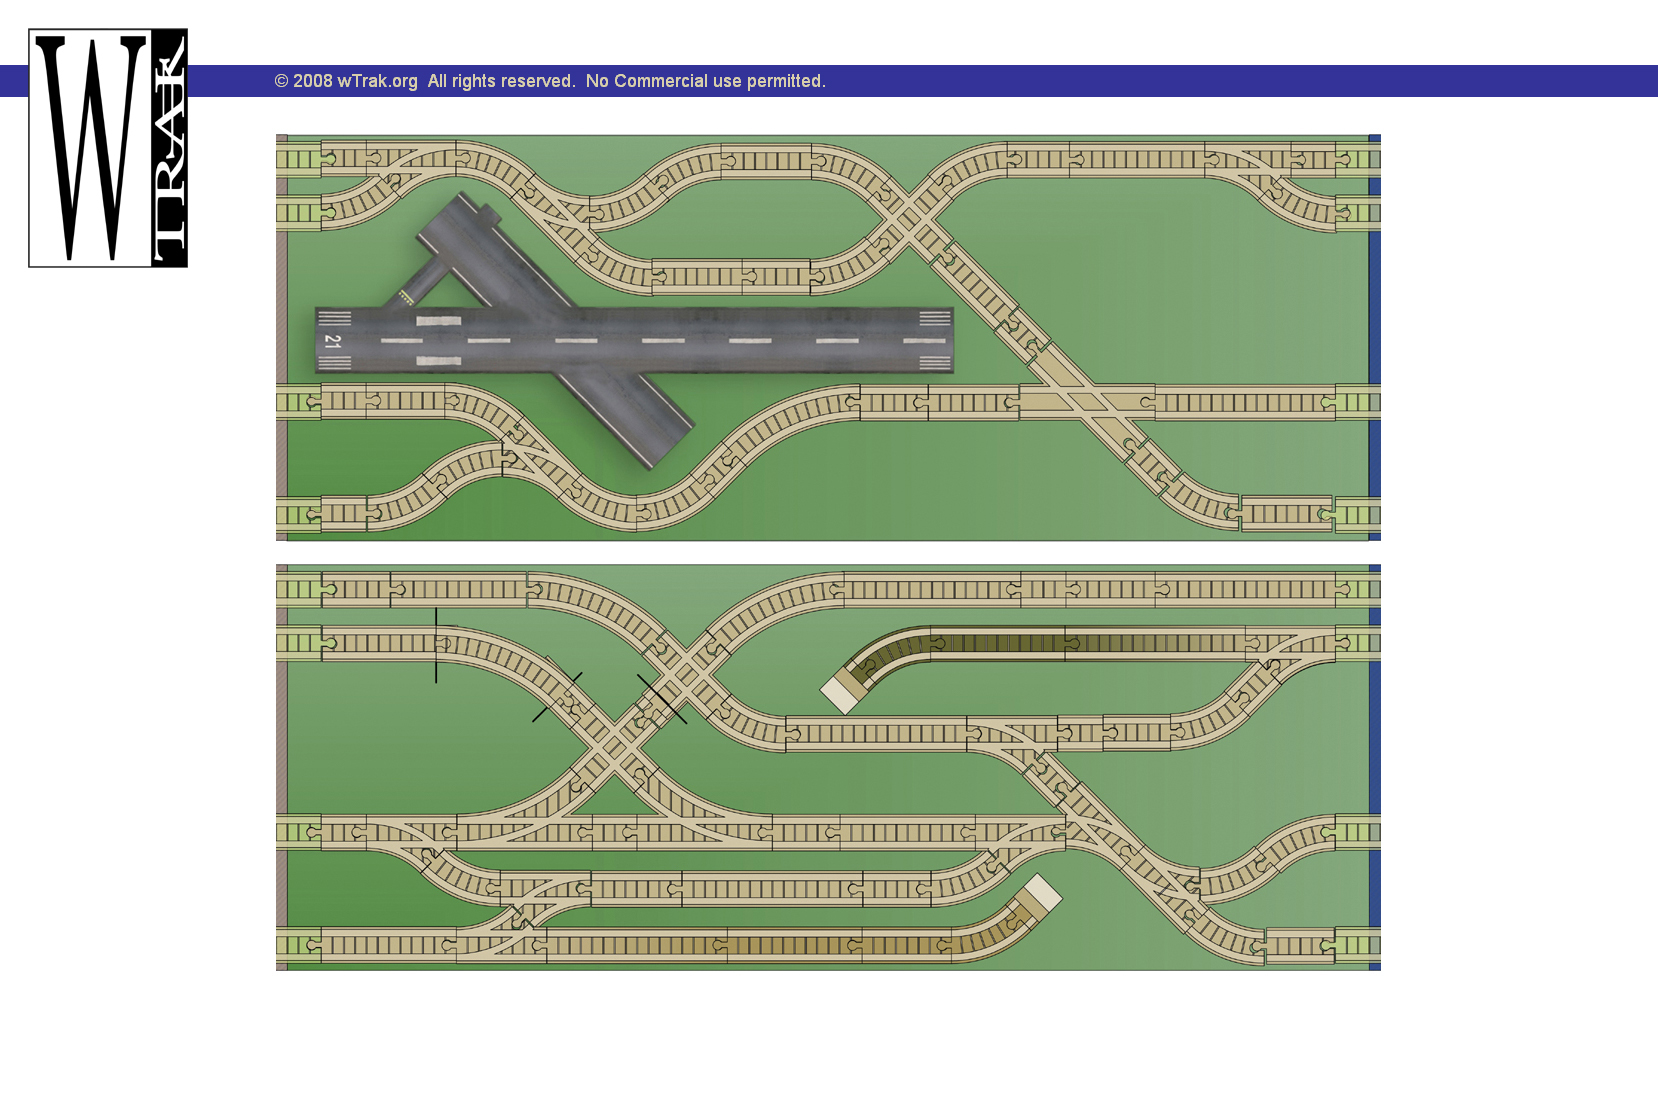
![]() Moving sections around can take a few minutes. To make this more convenient, print a copy of each segment and arrange these until you have a final configuration... A friend generated a set of tiles and I find these to be really handy - they are almost as much fun as playing with trains! You can make your own using photographs glued to hardboard or paperboard. A starter set based on ideas presented on this website follows:
Moving sections around can take a few minutes. To make this more convenient, print a copy of each segment and arrange these until you have a final configuration... A friend generated a set of tiles and I find these to be really handy - they are almost as much fun as playing with trains! You can make your own using photographs glued to hardboard or paperboard. A starter set based on ideas presented on this website follows:


![]()